Feeds:
Posts
Comments

Archive for September, 2011

The cost of health?

There is much discussion these days about food and health, and the often complicated relationship between the two.  When I entered the school of public health two years ago it was my mission to have that conversation from a different perspective.  I believed then, and believe even more strongly now that very little about our health can change without a few basic skills.  These skills are the skills of knowing where to find healthy food and how to prepare it.  That’s right, I believe with all of my soul that cooking is a public health strategy!

Cooking used to be something that was passed down from generation to generation, family rituals and cultural traditions along with it.  These days it is a disappearing art, falling to the wayside along with things like handwritten letters.  The once common experience of sharing in the preparation of the meal, and in the nourishing of others is now a rare one.

One thing I know for sure is that our most recent attempts at nutrition education-the food guide pyramid and 5 a day programs haven’t really worked. While it is interesting and useful (somewhat) to know that kale is rich in calcium and vitamin A, and that strawberries are full of vitamin C, what is more important is knowing that kale stir fried in toasted sesame oil and ginger is delicious, and that strawberries and honey mixed with oatmeal are a fantastic breakfast treat.
Only 1 out of 5 children in the country is eating the recommended fruits and vegetables per day. Something has to change.

I have written a lot about the claim that healthy food is more expensive and that it takes time that people don’t have.  Meanwhile, the average American is watching up to 4 hours of television per day, and more and more it is clear that good, whole food can be bought and prepared for less than a typical fast food meal.  It is simply a matter of commitment.

Mark Bittman, the New York Times food columnist has recently shifted his focus around this topic and is giving large audience to some of the issues many of us have been working on for years.  In a recent New York Times article (Saturday September 24) entitled “Is Junk food really cheaper?” Bittman tackles this question with simple comparisonsFor the complete article, click here

He also highlights issues of access to healthy foods,  and the strong link between low income communities and higher rates of obesity.  He describes some exciting projects throughout the country that are addressing some of these problems as well as acknowledging the large amount of work still ahead.  Ultimately, Bittman shows what many of us already know-that eating good real, whole food is not only nourishing and life sustaining, but it is affordable too.  I believe with all my heart, and it is the central theme of my cookbook:  if we focus on the joy of good health and good food shared with one another we will all come out ahead. Our food system is complicated when it should be simple, and unhealthy when it should be nourishing us all.  I am commited to working to get families, neighbors, schools and communities back into the kitchen to share the joy and the benefits of sharing a simple meal prepared with love.

Read Full Post »

Spinach Pie

Some things are so simple you can’t believe how delicious, or beautiful they are.  Such is the case with spinach pie. As a caterer, I wince just a little when someone orders spinach triangles because rolling 200 little phyllo footballs can be exhausting.  The truth is, making 200 of just about any food item is exhausting, and these give so much bang for your buck it turns out it’s worth it.

Of all the vegetables I have seen in Mendoza, the spinach is some of the darkest and heartiest.  Combined with spring onions (it actually is spring here!) herbs and cheese, the filling is done.  My vision was complete when I spotted fresh phyllo dough in my local favorite meat and cheese shop.  It was folded in clear bags and refrigerated, not frozen. This sealed the deal for me, and I was off to cook.  The phyllo dough was the freshest and most pliable I have ever used.

Mozzarella and Masa Filo

cheese added to sauteed spinach/onion mixture

The filling really is simple.  Saute onions and well chopped spinach in olive oil until wilted (about 1 minute). Add herbs-I typically use dill weed, but have yet to find that here so instead I used thyme and oregano.  Traditional spanakopita uses eggs which bind everything together but I have found that they are unnecessary.  The last step is to add the cheese which is usually a good feta but again I haven’t found a good feta yet, so I used mozzarella which turned out to be a perfect alternative.

The most challenging part of the pies is working with phyllo dough.  As I said, this dough was pliable and soft, so it was easy to work with.  I take a whole pile of sheets and cut across to create strips about 3″ by 12″.  If you are using frozen phyllo, the best thing to do is to thaw it completely and then open it.  When using it, you can cut a portion of the pile while keeping the rest of the dough covered with a lightly moistened cloth.  This is a delicate balance because the dough can dry out easily but if it gets too wet it will quickly become paste. You will also want a small bowl of olive oil and a pastry brush, and a prepared, oiled baking pan. Have everything arranged before you start so you can work efficiently-in chef lingo this is “mis en place”.  It means everything in place, and really does make the difference between an efficient kitchen and chaos.
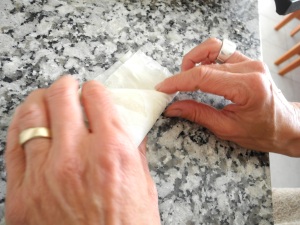
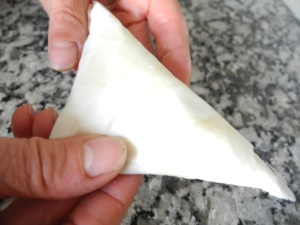
Finally, it is just assembly.  Remember those paper footballs we used to make in gradeschool?  It is the exact same concept.  I brush and layer about three or four strips on top of one another,  place a spoon full of  filling on one end and fold tightly into triangles.  If you don’t end exactly flush, you can fold the remaining piece over, or simply cut it off.  Place on baking pan. When the pan is full, brush each triangle with olive oil, sprinkle with herbs and bake in 375 degree oven for about 15 minutes.  They should be nicely and evenly browned, and slightly puffy.  That’s it.

As with empanadas and all other little pockets of deliciousness, it can be hard to watch all your hard work disappear in one day-and believe me, they will disappear.  Keeping in mind the fact that everyone, including the kids LOVES these little treats, I am learning to let go.

Read Full Post »

Empanadas

Along with the Italian inspired pastas and pizzas, the other ubiquitous and intriguing food in Argentina is the empanada

Every culture seems to have some version of a delicious, portable dough package filled with savory or sweet concoctions:  the Asian dumpling, pot sticker or momo, the Italian calzone and stromboli, the African sambusa, the Indian samosa and the Eastern European pasty (familiar to many in Northern Minnesota-where it was a convenient and filling food for miners to carry in their lunchboxes).  Apparently, Spanish traders, brought their pastries along while settling throughout the world between the 1500s and 1700s,  the Portuguese are credited with introducing empanadas to Southeast Asia.

The concept lends itself to interpretations, even within Argentina.  The tradition is generally meat based fillings, which vary depending upon the region.  The most famous are from Tucuman and filled with large chunks of meat, in Salta they add potatoes and cayenne peppers, and similar ones including olives, hard boiled eggs and garlic are prepared further South.  In Patagonia they are filled with seafood or lamb, and in Cordoba they add sugar and raisins to the meat, and also prepare raspberry, chocolate and dulce de membrillo (quince jam).  These days, you can also find spinach filled empanadas, a delicious sweet and savory corn and cheese mixture called ‘humitas’ and almost every restaurant offers a caprese empanada with mozarella, basil and tomatoes.

Empanada shells are easy to find in any grocery store or specialty shop. A package of 12 costs about $2 and they are generally perfect.  I have experimented with my own dough, as well as the pre made.  Thus far, I have to admit that the pre-made doughs have surpassed mine for flakiness and perfect browning, but I haven’t given up yet. As for the ingredients, mine are whole grain, something you won’t find in the grocery store or anywhere in the city. I will also add that my (very) unconventional fillings have proven quite delicious and I continue to dream up even more ideas.  I have made them with lentils, and also with potatoes and garbanzos (like a samosa).

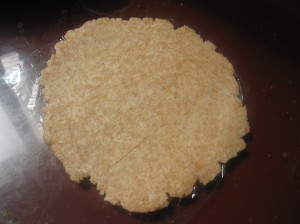
first attempt at home made crust with cornmeal

"La Española brand next to my home made whole wheat dough

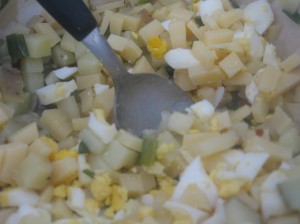
  Today I made two fillings.  One was a potato, parmesan cheese and hard boiled egg combination and the other was chard and white bean.  Both were delicious and very different.  Really, the possibilities are endless.

As with all pies, the dough is very important.  My first attempt was basically a pie crust with a mixture of wheat flour and cornmeal.  While it was quite tasty, it was a little too dry and doughy for the filling.  This time, I adapted one given to me by our landlady who is from Salta.  I used 2/3 whole wheat and 1/3 white flour, and water, though not quite as much as suggested. They are big fans of cornstarch in doughs here.  You see it in everything from cookies to empanadas.  I am not sure I think it is necessary, but this recipe has a small amount and seemed to work fine.  Even though it was mostly whole wheat, the dough was very moist and pliable.  The thickness is also important, and I haven’t quite mastered that.  I used the plastic squares from the packaged dough to roll out mine which worked quite well.

Filling it is pretty straightforward.  You fill about half leaving some space around the edge and then fold the dough over.  The challenge is to get it over the filling without ripping a hole in it, and then to successfully seal it.  I have seen many empanadas without a fancy edge to them.  The Mendocinos seem fine with just a pinched edge.  I settled for that as well.

All in all, these were delicious, and fun to make.  They are a bit time consuming, so I’d suggest making a lot and freezing some for later.  I felt a bit protective of them and winced each time another got eaten.  Such is the case with hand made food.  I am anxious to continue experimenting, and am even thinking about a sweet apple filling this morning…….

yummy for breakfast too!

EMPANADAS

Masa (dough) de empanada

Harina (flour) 3 kilogramos

Manteca (butter)  1/2 kilogramo

Grasa (fat/oil)  200 GR

Agua (water) 1.2 litros

Sal (salt) .75 GR

Almidón de maíz (cornstarch)

Para hacer la masa, poner los ingredientes secos en un tazón de fuente. Mezclar la manteca y la grasa en la harina. Agregar el agua y mezclar apenas hasta que se junte y pueda formarse fácilmente una bola. Estirar la masa y doblarla, poner almidón de maíz entre las capas. Refrigerar por lo menos una media hora, luego cortar la masa en discos redondos

(To make the dough, put dry ingredients in a bowl.  Mix the butter and fat into the flour.  Add the water and mix until just together and you are able to form the dough easily into a ball.  Knead the dough and put the cornstarch on to coat.  Refrigerate for at least a half hour and then cut the dough into circles)

RELLENO (filling)

Las empanadas de carne de vaca son uno de los platos más tradicionales de Argentina.

Carne picada (chopped meat) (2.5 kilogramos)

Cebolla rebanada (sliced onion)  (1.25  kilogramo)

Grasa (oil/fat) (150 GR)

Huevos duros (hard boiled eggs)

Un poco de sal, pimienta, paprika y orégano (a little salt, pepper, paprika and oregano) .

Freír la cebolla en aceite caliente hasta que este cocida, bajar el calor y agregar la carne picada, cuando esté cocida agregar los huevos duros y las especias . (Fry the onion in hot oil until cooked, lower the heat and add the chopped meat.  When this is cooked, add the eggs and spices)

Finalmente, agregar algo del relleno al centro del círculo de cada disco de masa. Pegar los bordes hasta el final, formando semi un círculo. Cada una de nuestras empanadas tienen diversos “repulgues”, esto se hace generalmente para distinguirlos.

Para tener una superficie mas dorada, pintamos con una yema de huevo la parte superior de la masa de empandas, las ponemos en  horno muy caliente de arcilla por aproximadamente 10 minutos.

(Finally, add the filling to the center of each circle of dough.  Fix the borders around the edges to form a semicircle.  Every one of our empanadas has different edges, this is generally how you can identify them.  To make a more golden surface, brush the surface of the dough with egg yolk, then bake in a very hot clay oven for about 10 minutes)

Read Full Post »

Ready for the week

Just like at home, Sunday rolls around too quickly here, and there is always the question “what do we need for the week?”. For me, this is generally a question about food. While I am slowly finding sources for most of the foods I want and need, some of them are simply not as good as mine. That said, I have decided to try to supply these items myself. Two of the most basic, and most popular in our house are bread and granola. While for many people, these can be intimidating, or mysterious to make, I actually find them both to be simple and straightforward. The recipes I use are a synthesis of many similar recipes I have tried over the years. Believe it or not, there is actually room for error with both, and also lots of room for interpretation.

I started my granola making career at the Seward Cafe in 1988. After hours every Tuesday night, long after all the super green earths and tofu scrambles had been eaten, Jeffrey and I would converge upon 200 pounds of rolled oats, shredded coconut, sesame seeds and almonds in giant plastic garbage bins. I remember pouring the amber colored oil and honey mixture over the dry ingredients, and proceeding to hand mix the sticky concoction. I took great pleasure in being up to my armpits (literally) in such a wholesome, and sweet treat that would soon be enjoyed by co-op shoppers all over the city. Some things are timeless….my current granola recipe is little changed from this original, and I still believe that the Seward cafe serves some of the highest quality, most sustainable and cleanest food around.

Adding the warmed honey and oil to the oats mixture

Really, there is not much more to making granola than mixing everything together and baking it until it is a beautiful golden brown.  The combination of dry goods is up to you.  I like to add things that crunch, like almonds, coconut, sesame or flax seeds.  If adding dried fruits, I suggest waiting until after the granola has baked, otherwise they will expand in the oven and dry out.  Also, watch closely and stir often.  I prefer maple syrup in my granola, but it is impossible to come by here, and the local honey is pretty fabulous though it does brown and burn easily so be careful. It is easiest to use a pan that has sides to help with stirring.  The deeper the pan, the more frequently you will need to stir.

ready to bake

And nicely browned from the oven

YUM

And what better to eat with that bowl of fresh granola?

BREAD

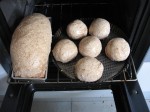
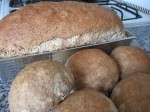
As with the granola, this recipe is a synthesis of several breads I have made over the years.  Here, the most important thing is to use fresh yeast and high quality flour (be creative, and add things like oats, cornmeal, millet or seeds-about 1/4 of the four quantity), and be patient.  Once the yeast has been activated, and the flour added, use your intuition to achieve that perfect texture-firm and moist, but not sticky.  You should be able to knead the dough forcefully without any coming off on your hands or on your kneading surface.In a warm space, the dough should rise quickly and you will end up with a lovely and delicious loaf!

GRANOLA

This recipe is in my book, I have noted any changes I made:

The Family Kitchen:  Recipes like this can be a great learning opportunity for kids.  They get to see that the foods they thought came only from a store or a box are really a simple combination of basic ingredients, and that they have a choice about whether or not to create their own.  In addition, as with most of these recipes, kids are empowered to think creatively about texture, flavor and even aesthetics.  Best of all, there is nothing like fresh warm granola right out of the oven!

1 cup oil (coconut, sunflower or canola oil are good options)
1 cup maple syrup (I used honey)
1 tablespoon vanilla
Heat this in a saucepan over medium heat until viscous–about 5 minutes.

In separate bowl combine:
10 cups regular rolled oats
2 cups each of any of the following:
Shredded coconut
Toasted and chopped nuts
Flax seed
Dried fruit (reserved for after baking)

Mix wet and dry together until well coated—the mixture should be moist but not wet. Spread it into a baking pan and bake at 350 degrees for about 20 to 25 minutes. Stir the granola frequently so the top layer and edges do not burn. It should have a lovely golden color throughout. Remove from oven when brown, and mix in dried fruit now if using. Let cool completely and store in airtight container. You can also store in a heavy duty Ziploc bag in the freezer.
Serves 12 to 14

 SIMPLE WHOLE WHEAT BREAD

5 cups warm water
1/4 cup yeast
Allow yeast to activate/bubble (about 5 minutes).

When yeast is activated or bubbly, add:
11-12 cups assorted flour-approximately 8-10 cups whole wheat bread four, and 2-3cups other (cornmeal, oats, seeds).
2 tsp salt
Add slowly, and mix often until the dough begins to hold together and pull away from the sides of the bowl.  Continue adding flour until dough is nice and smooth.  It should be firm enough to knead with strength without sticking to the bowl.  Remove from the bowl onto a floured surface and knead for about 5 minutes, until very smooth.   Place in oiled bowl in a warm place for about 45 minutes to 1 hour, until dough has risen.
Knead again for another 5 minutes, and place in oiled pan.  You can place directly on a baking pan for a more “rustic” shape.  Let rest about 20 minutes, then bake in 375 degree oven for about 40 minutes.  Turn once or twice in the oven, and brush with oil about half way through.

Read Full Post »

Asado

As I mentioned in a previous post, the meal is at the center of the family in Argentina. Or, as my new friends explained “the kitchen is the soul of the home”. While the food may be different from what we eat in the US (or not) gathering together with family and friends around the table to eat hand made food and drink together is highly valued here, and it is a wonderful custom.

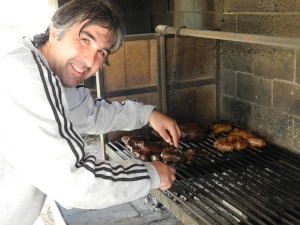
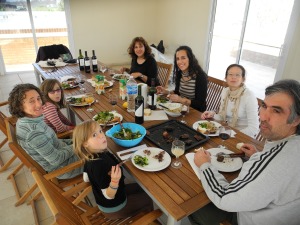
It was only a matter of time before we would get invited to our first Asado-the very traditional, very Argentinian grill meal.  They are usually on weekends or holidays, because they are long events with much eating, drinking and laughter. The meal is centered entirely around assorted grilled meats, but I was invited to contribute  salads which helped to balance things off a bit.  It didn’t hurt that the group consisted of a new Expat friend and her Argentinian rural ag development boyfriend, a Mendocinan woman who is studying to be a chef, and another who is studying to be a sommelier, all of whom are hip to natural, whole foods..  Not a bad mixture of folks with whome to share our first Asado!

Ramiro, our grill master explained that the only seasoning he put on the meat is coarse salt.  This is very similar to the chicken that Marta prepared for us, and  the simplicity of this method is quite delicious.  The meat turns out tender and flavorful, and the salt brings out the flavor to the subtle fat of the meat.

We started off with small snacks, including a local goat cheese from one of the farm’s Ramiro works with, and local olives which are also abundant here and the source of some fabulous local oil.

The two salads I contributed complemented the meat nicely, and added color, texture and flavor to the meal.  The first was primarily a green salad, with a mixture of spinach, arugula and lettuce, and including avocado, red onion, grapefruit and shavings of cheese (Sardo-a version of Romano).  The other was a quinoa salad adapted from a recipe in my book, which included dried apricots, toasted walnuts, green onions and chard in a toasted sesame dressing.

And of course there was wine.  Plenty of it.

The meal was lovely, the company was spectacular and the wine went down well.  We laughed a lot, and enjoyed being together on a gorgeous Sunday in Mendoza.  We even had a chance to soak our feet in the pool on the sunny patio with a beautiful view of the mountains.


This is the original quinoa recipe from the book, I noted where I made adaptations:

Quinoa and Cucumber Salad
[VEGAN]

I created this recipe because I really wanted a cool summery grain salad, but something other than tabbouleh (nothing against that wonderful dish, but there’s more to life than mint). It is a joy to cook with sesame oil–its nutty flavor stands up to cooking and adds a wonderful layer of complexity to any dish. The fresh notes of honey and juice balance the tartness of the mustard, and the crisp cucumber and tangy currants are an unusual match finished by the sweet crunch of the nuts.

The Family Kitchen: In addition to chopping cucumbers and chard leaves, this recipe has a lot of room for variation, so encourage the kids to taste and describe the flavors, and come up with other ingredients to add or to use as substitutes for those listed.

Salad:
2 large cucumbers, halved and sliced (I omitted these)
2 cups quinoa cooked in 4 cups water
1 sweet onion, sliced thinly (I used a large green onion)
½ cup currants (I used small diced dried apricots)
1 bunch chard leaves (or other greens like spinach, lacinato kale or mustard), stems removed and chopped small.  The raw greens work fine in this salad as the small pieces soften in the dressing, but maintain their integrity as well as their bright color.
1 cup toasted cashews or pecans (I used walnuts)

Dressing:
¼ cup toasted sesame oil
¼ cup safflower or canola oil
1 teaspoon salt
½ cup rice vinegar
2 tablespoons honey
2 tablespoons mustard
2 tablespoons tamari
¼ cup orange or apple juice

In a small bowl, combine dressing ingredients and mix well. In a larger bowl, combine salad ingredients and pour dressing over salad. Mix well and refrigerate until very cold. Serve as is or over a bed of greens.
Serves 10 to 12

Read Full Post »